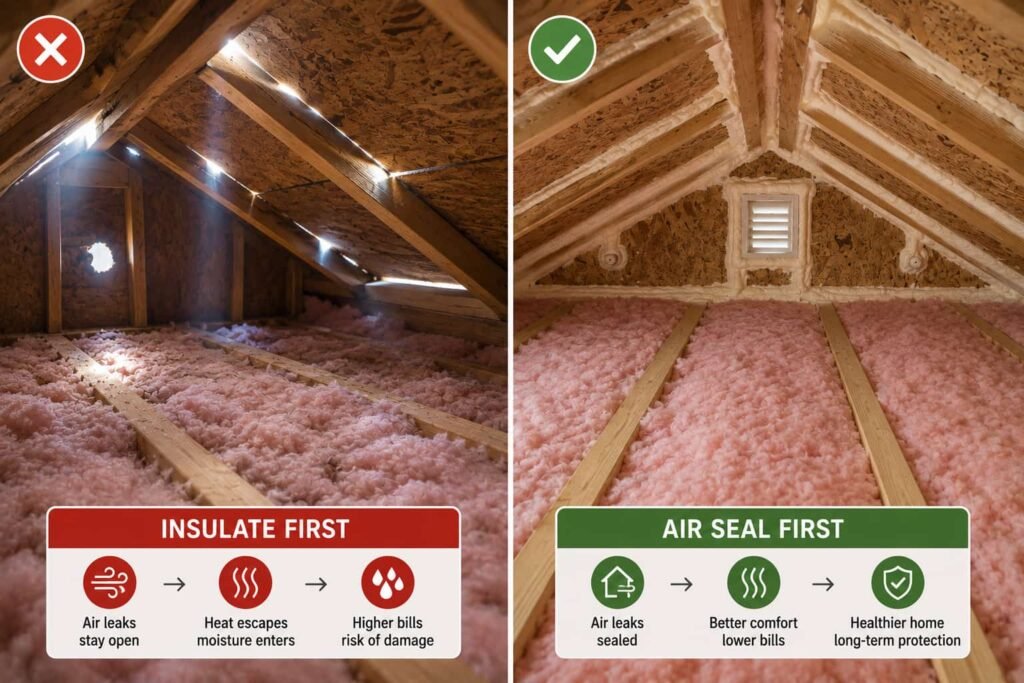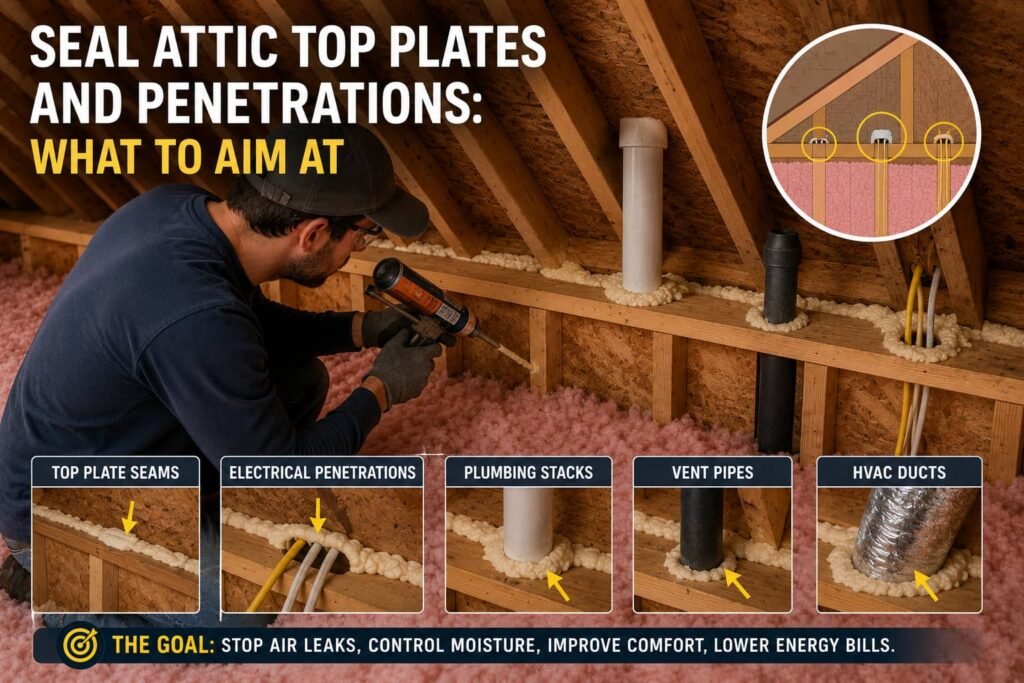
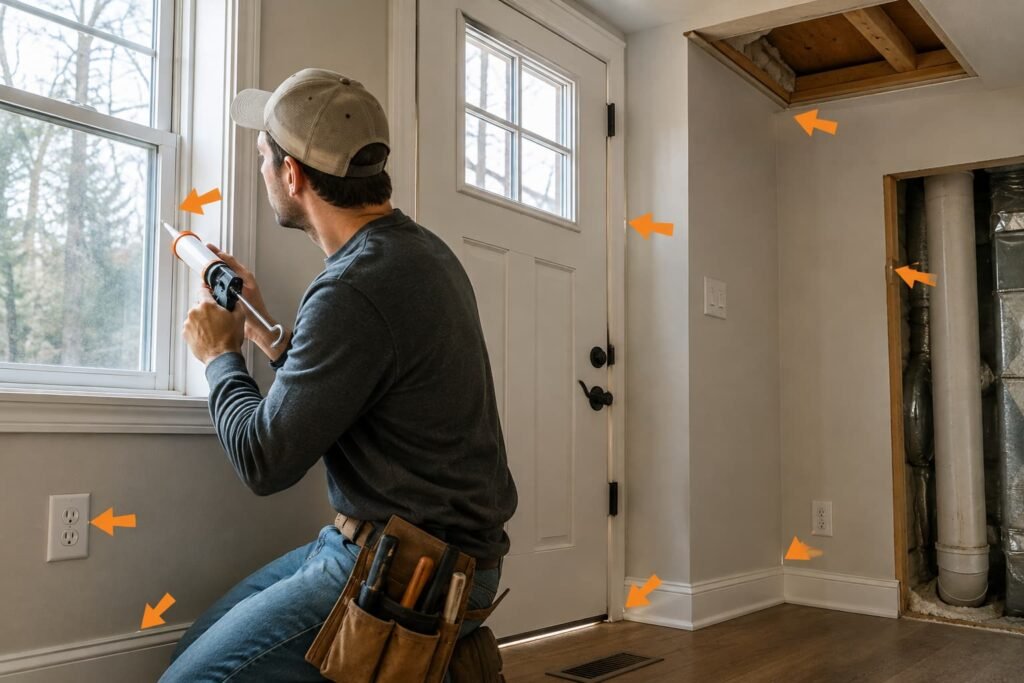
Air sealing means closing the gaps that let conditioned air escape and outside air in. The leaks that matter most are usually not the windows you can feel. They are at the top of the house, where the attic floor meets the walls, and at the bottom, at the sill plate and rim joist. Most of the attic floor work belongs to the homeowner. Some of it does not, and this guide says which at every location.
The order matters as much as the map. Find the leaks, seal them, then insulate, then confirm the house still breathes and that any fuel burning appliance still vents the way it was designed to. Done in a different order, the work is wasted, and in one case it is a safety problem rather than a wasted weekend.
Why the draft you feel is not the hole that matters
Warm air rises. In winter a heated house behaves like a chimney: air pushes out through gaps high in the building, and that outgoing air has to be replaced, so cold air gets pulled in low down through the sill, the crawl space and the basement. Building scientists call this the stack effect, and it is why the top and bottom of a house leak far more than the middle.
That is also why the draft at the sofa is misleading. You feel cold air at knee height near a window because that is where replacement air arrives, but the pressure driving it comes from a hole you cannot see above the ceiling. Seal the window and the house still pulls the same volume of air, it simply finds another way in. Seal the attic floor and the pressure driving the whole system drops.
Before you seal anything: the combustion safety line
This comes first because tightening a house changes how it vents. If your furnace, boiler, water heater or fireplace is atmospherically vented, meaning it draws air from inside the house and relies on natural draft up a flue, then reducing air leakage and running exhaust fans can create enough negative pressure to pull exhaust gases back down the flue into the living space. The US Department of Energy calls this backdrafting, and what it can bring indoors includes carbon monoxide, which you cannot see or smell.
The Department of Energy also lists signs of poor draft you can look for without any tools: soot or burn marks around a burner or at the vent collar, and visible smoke in the utility room while the appliance is running. Either one means stop and call the trade before you seal anything.
What that means before a large sealing job
- Make sure you have working carbon monoxide alarms, tested, and installed according to the alarm manufacturer's instructions.
- Have a licensed HVAC technician, a licensed gas fitter or a certified energy auditor run a combustion safety test, often called combustion appliance zone or CAZ testing, before and after the work. Building America, a Department of Energy program, describes this testing as something done at the end of each workday while air sealing is under way.
- Treat that test as the decision, not a rule of thumb from a blog.
This site prints no step by step for anything touching a gas line, a flue, a vent connector or a burner. That work is licensed in most US jurisdictions for good reason, and this article stops where the licence starts.
The leak map, top to bottom
The table below is the working list, ranked roughly by how much air moves through each location rather than by how much you notice it. ENERGY STAR's attic guidance names the three places where leakage is likely to be greatest: where walls, inner and outer, meet the attic floor; dropped soffits, meaning dropped ceiling areas; and behind or under attic knee walls. Those three sit at the top of the list because a national program that has looked at a great many attics put them there.
| Location | How air gets through | Material | Yours or not |
|---|---|---|---|
| Attic floor where walls meet the ceiling (top plates) | Open stud cavities run from the wall into the attic past the top plate | Polyurethane foam over 1/4 inch, caulk below | Yours |
| Dropped soffits over cabinets and vanities | The soffit is an open framed box connected straight to the attic | Rigid foam board or foil blocking, sealed at the edges | Yours |
| Behind and under knee walls | Open floor cavities under the sidewall of a finished attic room | Rigid blocking, sealed on all four edges | Yours |
| Wire and pipe penetrations | Holes drilled larger than what passes through them | Fire block rated foam, caulk for small gaps | Yours, unless the wiring is knob and tube |
| Plumbing chases and the vent stack | Annular gap at the pipe, often a whole open chase | Foam at the gap, rigid blocking across a chase | Yours |
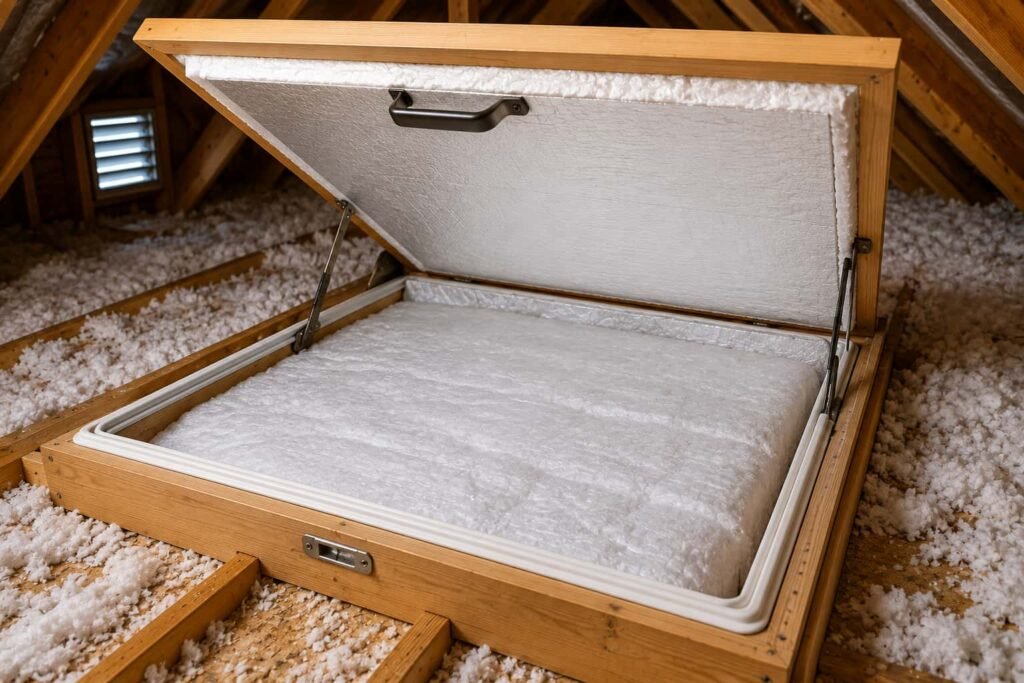
| Attic hatch or pull down stair | An uninsulated, ungasketed panel in a hole in your ceiling | Weatherstrip gasket plus rigid foam on the attic side | Yours |
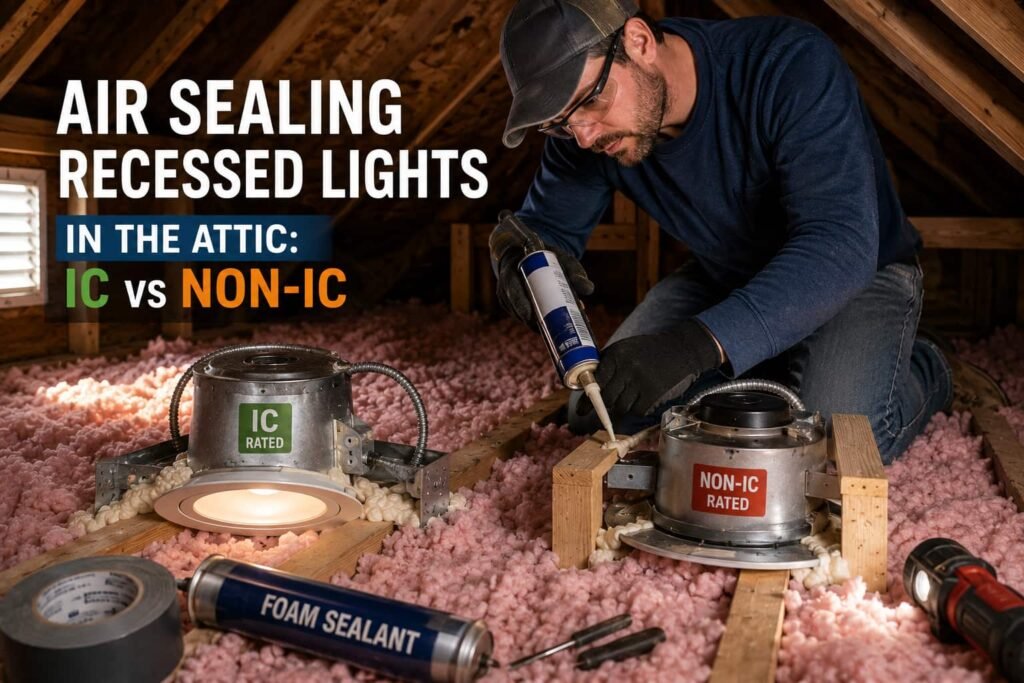
| Recessed can lights | The fixture housing vents into the attic by design | Only what the fixture's own listing permits | Only if it is IC rated and airtight. Otherwise a licensed electrician |
| Chimney chase and furnace flue | A framed opening left oversized for required clearance | Aluminum flashing, high temperature caulk, a metal dam | Yours with those materials only, and only if flue and masonry are sound |
| Exterior door frames | The gap between frame and rough opening, behind the trim | Exterior caulk, backer rod first in wide joints | Yours |
| Window frames, from outside | The joint between the frame and the siding or sheathing | Exterior silicone or siliconized acrylic caulk | Yours, exterior caulk only. See the note below |
| Outlets and switches on exterior walls | Air moves through the wall cavity and around the box | Foam gasket behind the cover plate | Cover plate only, breaker off. Inside the box is an electrician's |
| Baseboards and floor to wall joints | The gap between drywall and subfloor, hidden by trim | Paintable acrylic latex caulk | Yours |
| Sill plate | The joint between the wooden sill and the concrete foundation | Caulk, backer rod first where the joint is wide | Yours |
| Rim joist | The band of open joist ends around the whole perimeter | Rigid foam cut to fit, sealed at every edge | Yours, and it deserves its own project |
| Foundation penetrations | Gaps at the hose bib, dryer vent, service entry and gas line | Caulk or foam at plumbing and vents | Yours, except the gas line and electrical service entries |
| Crawl space hatch or door | An uninsulated, ungasketed panel to an unconditioned space | Weatherstrip and rigid foam, as with the attic hatch | Yours |
One note about windows
This site covers the building and the attic. Window weatherstripping, sash repair and window film are not covered here, and you will not find instructions for them on this page. What is covered is the exterior caulk joint where the window frame meets the wall, because that is a hole in the building envelope rather than a hole in the window. For the interior side of a leaky window, ENERGY STAR's own do it yourself sealing guide is a free, non commercial place to start.
How to find the leaks before you seal them
The Department of Energy describes a building pressurization test a homeowner can run. On a cool, windy day, turn off all combustion appliances such as gas burning furnaces and water heaters. Close all windows, exterior doors and fireplace flues. Turn on every exhaust fan that blows air outside, the clothes dryer, bathroom fans and the range hood, or use a large window fan to pull air out. The house goes slightly negative, which exaggerates every leak. Then pass a lit incense stick slowly around suspected leak sites: wherever the smoke wavers or gets pulled, there is a draft. A damp hand works too, since moving air feels cool on wet skin.
Two conditions. The combustion appliances stay off for the whole test, and if you are not comfortable shutting a gas appliance down and restoring it afterward, have whoever services it do that part. Second, this finds where air moves; it does not measure how leaky the house is. That measurement is a blower door test, run by an energy auditor, and it is the only way to know whether the sealing changed anything.
Where a homeowner stops
Read this before you buy materials, not after. A sealing project is mostly caulk and foam, and then occasionally you lift a piece of insulation and find something that ends the job. Each of these has a trade attached to it.
| What you find | Why it stops the job | Who takes over |
|---|---|---|
| Knob and tube wiring, common before about 1930 | ENERGY STAR lists it as a fire hazard in contact with insulation | Licensed electrician |
| A recessed fixture not marked IC rated and airtight | Sealing or covering it traps heat against combustible material | Licensed electrician |
| Anything needing an electrical box or panel opened | Live conductors, and licensed work in most US jurisdictions | Licensed electrician |
| A flue, vent connector or water heater vent that is loose, rusted, disconnected or scorched | This is the path your combustion gases take to get outside | Licensed HVAC technician or gas fitter |
| A chimney chase with cracked masonry, missing mortar or soot staining | A damaged flue can leak exhaust into the framing cavity | Chimney professional, then the appliance's trade |
| Vermiculite insulation, a light, pea size, flaky gray mineral | The EPA advises leaving it undisturbed and not removing it yourself, because it may contain asbestos | Licensed asbestos abatement contractor, after testing |
| Suspect pipe or duct wrap on older equipment | Same reason. Do not scrape, cut or sweep it | Licensed asbestos abatement contractor |
| Wet or moldy insulation, rotted rafters or joists | You have a water problem, and sealing over it makes it worse | The relevant contractor, water source first |
| A bath fan or dryer duct that dumps into the attic | Sealing a wetter attic tighter is the wrong move | HVAC or ventilation contractor |
| Any fuel burning appliance inside the house | Backdrafting risk, described above | Combustion safety test by a qualified professional |
The attic itself is a hazard before you reach any of that. Loose fill insulation hides the joists and there is no floor between them, the space gets very hot, and fiberglass and cellulose dust call for a respirator, goggles, gloves and long sleeves. Furnace flues, as ENERGY STAR puts it plainly, can be very hot.
The materials, matched to the gap
Sealant choice is mostly about gap width and heat. For joints under about 1/4 inch, caulk is the answer: acrylic latex where it needs paint, such as baseboards and interior trim, and silicone or siliconized acrylic outdoors where the joint moves and gets wet. For anything wider, canned polyurethane foam expands to fill the cavity, and for a penetration through a fire separation the fire block rated version is the one to buy. For a joint that is both wide and deep, such as a sill plate on uneven concrete, push in a foam backer rod first so the caulk forms a thin skin instead of a thick plug that tears.
Two materials are not interchangeable with the rest. Around metal flues and masonry chimneys, ENERGY STAR specifies aluminum flashing and high temperature, heat resistant caulk, and notes that building codes require one inch of clearance from metal flues and two inches from masonry chimneys to any combustible material, including insulation. Code adoption varies by state and locality, so confirm the clearance with your local building department. Ordinary foam and ordinary caulk do not belong near a flue.
What the ENERGY STAR savings number actually says
Almost every contractor page on this topic prints a savings percentage, they disagree with each other, and none of them says where the number came from. This site uses one figure, from ENERGY STAR's own methodology page, accessed 2026-08-23:
"EPA estimates that homeowners can save an average of 15% on heating and cooling costs (or an average of 11% on total energy costs) by air sealing their homes and adding insulation."
Read the conditions attached to it. It is an average produced by energy modeling of cost effective improvements applied to typical existing US homes built between 1970 and 1989, weighted across climate zones, construction styles and fuel types. The same page shows the estimate varying substantially by climate zone. It is a model output for a category of houses, not a measurement of yours, and it covers sealing plus insulation together rather than sealing alone. A newer house, an already tight house, or a mild climate should expect less.
You will see 20, 25 and 30 percent elsewhere. We do not know where those came from, so we will not repeat them.
What to do after sealing, in order
Sealing is the second of four steps, and each depends on the one before it.
- Find. Map the leaks with the pressurization test above, or pay for a blower door test if you want a number to measure against later.
- Seal. Work the attic floor first, then the basement, crawl space and rim joist, then the middle of the house. That order follows the stack effect rather than your comfort.
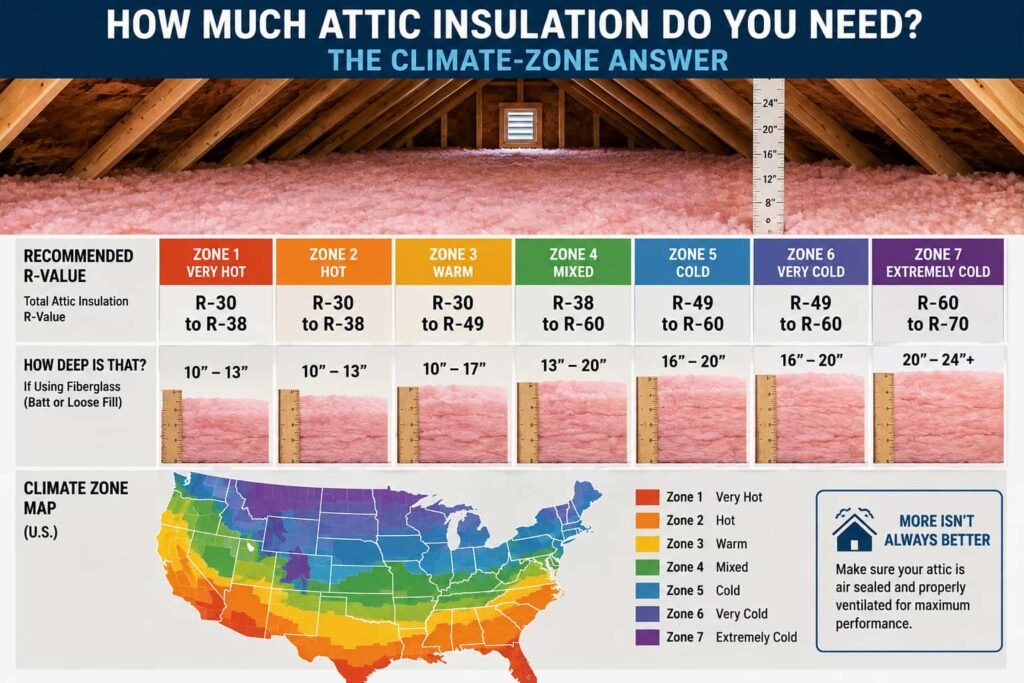
- Insulate. Insulation laid over unsealed gaps just filters the air moving through it. Once the attic floor is sealed, insulation levels come from the ENERGY STAR recommended R-value table for your climate zone, which is based on the 2021 IECC, with local code adoption governing.
- Check ventilation and combustion. A tighter house needs deliberate ventilation, and any atmospherically vented appliance needs its draft rechecked by a qualified professional after the work.
Skipping step four is the one mistake on this list that is dangerous rather than merely expensive.
Frequently asked questions
Can you seal a house too tight?
You can seal a house tighter than its ventilation and its combustion appliances were designed for, which is a real problem with a known solution. The Department of Energy's position is not to seal less, it is to ventilate on purpose: spot ventilation with exhaust fans in kitchens and bathrooms, or a balanced system such as a heat recovery ventilator or energy recovery ventilator that both supplies and exhausts air. The part not to improvise is combustion. If the house has an atmospherically vented furnace, boiler, water heater or fireplace, a professional combustion safety test decides whether the house is too tight for it.
Is air sealing worth doing on a newer house?
Often yes, usually with less to gain. Newer houses are built tighter and many were blower door tested at construction, but the same locations still leak: attic hatches, recessed lights, plumbing chases, top plates and the rim joist. The honest answer is that nobody can tell you what a specific house will gain without measuring it, and the ENERGY STAR estimate above is modeled on homes built between 1970 and 1989, so it does not describe a house built in the last decade. A blower door test before and after is the way to know.
Does air sealing cause moisture problems?
It changes how moisture moves, which is why the sequence matters. Air leaking through the ceiling carries water vapor into a cold attic where it condenses, so sealing that path usually reduces the problem rather than causing it. The risk runs the other way indoors: a tight house with no deliberate ventilation holds the humidity from showers, cooking and laundry that used to leak away. The answer is ventilation, plus making sure bath fans and the dryer vent outdoors rather than into the attic. If you already have wet insulation, rot or standing water in a crawl space, fix the water first and seal afterward.
How long does an air sealing project take?
There is no honest single answer, and the variables are the house rather than the technique: the size of the attic floor, whether loose fill insulation has to be moved and replaced, how many recessed lights and chases there are, how far you can stand upright, and how hot the attic gets. Most homeowners break it into sessions rather than doing it in a day, because attic work is physically demanding and rushing it on poor footing is how people put a foot through a ceiling. Set the stop conditions above before you start, so an unexpected find pauses the job instead of tempting you past it.
Sources
- ENERGY STAR, Seal and Insulate methodology page (the savings estimate and its modeling basis), accessed 2026-08-23.
- ENERGY STAR, "Sealing Air Leaks: Attic" do it yourself guide, including the vermiculite caution, accessed 2026-08-23.
- ENERGY STAR, "Getting Started" do it yourself guide, including the knob and tube caution and the conditions that call for a contractor, accessed 2026-08-23.
- ENERGY STAR, furnace flue sealing guidance (aluminum flashing, high temperature caulk, clearances), accessed 2026-08-23.
- US Department of Energy, Energy Saver guidance on detecting air leaks and the building pressurization test, accessed 2026-08-23.
- US Department of Energy and the Building America Solution Center, combustion appliance zone testing and backdrafting guidance, accessed 2026-08-23.
- US Environmental Protection Agency, guidance on asbestos contaminated vermiculite insulation, accessed 2026-08-23.
Building code requirements vary by state and locality. Where this page names a code figure it is quoting a national source, and your local building department or inspector governs what applies to your house.